Previous Story
DIY: How to Insulate Your Attic for Useable Living Space
Posted On 15 Mar 2020
Comment: 0
Just like roofs that require glass wool insulation, unconditioned attics can also be insulated. The installing glass wool insulation in unventilated attics requires specific techniques, guidelines, and tips that must be followed to the letter. Here is how to do it.
The various stages of installing glass wool insulation in unventilated attics
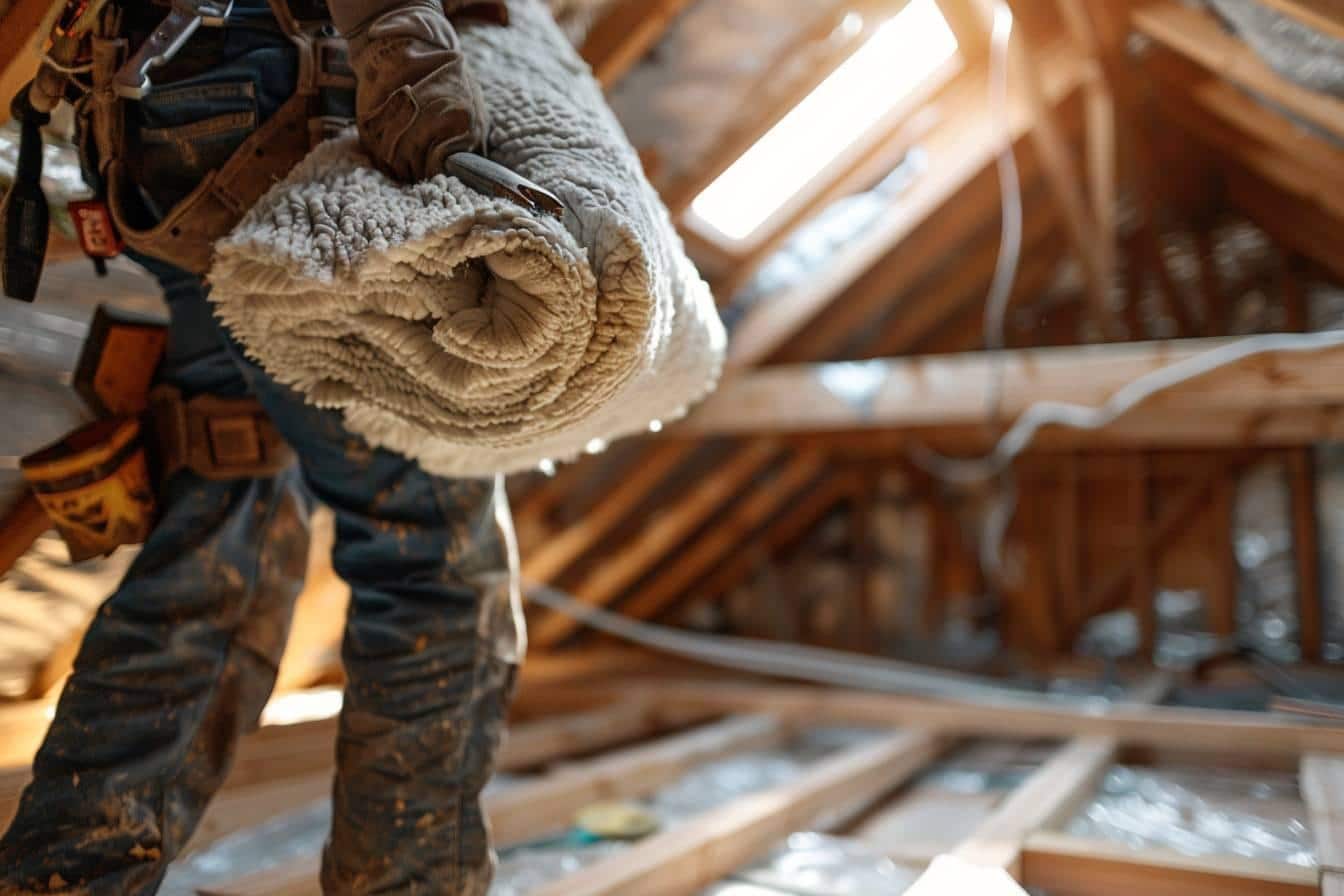
The steps for installing glass wool in uninsulated attics are quite straightforward. Once you have the right equipment, it is simply a matter of proper installation. If this task proves too difficult, industry professionals can assist you. The company David Isolation Nîmes (30) can utilize non-combustible insulation with specific properties to enhance your comfort by installing glass wool in uninsulated attics. Nîmes (30), the prefecture of the Gard department and the former seat of the Roman Empire.
*Installing glass wool insulation in unventilated attics*
Unfinished attics vary in size and are located at the top of the building. To ensure proper insulation for these spaces, various materials can be used, particularly glass wool. This fibrous material serves as an excellent thermal and acoustic insulator. In the case of unfinished attics, its primary purpose is to prevent heat loss from within your home.
Please note that there are two types of attics: convertible attics and non-convertible attics. Convertible attics are larger and can be used as additional bedrooms or home offices. Non-convertible attics, also known as unusable or crawl space attics, are spaces that cannot be utilized due to insufficient dimensions for any functional layout.
*Steps for installing glass wool insulation in unventilated attics*
Here is the difference between installing this insulation in these two types of attics. A converted attic must be insulated via the roof itself; you must follow the same procedure used for a standard roof. As for an unconditioned attic, the wooden floorboards must be insulated using a vapor barrier and rolls of glass wool. Here is how to proceed with insulating an unconditioned attic.
Insulating chimneys is a delicate process. It involves creating a safety buffer around the flue using this insulation. The same applies to spotlights that emit high levels of heat.
- *Installing the vapor barrier*
A vapor barrier must be installed on the substrate serving as the floor for the unventilated attic space. You must ensure that this membrane covers the entire floor surface. This film may already be integrated with the insulation roll (glass wool is available in batts, rolls, or loose-fill, with thicknesses of 60mm that can increase by 20mm depending on the application). In some cases, multiple layers may be required to cover the entire floor area, depending on the total surface area to be “filmed.” It is up to you to accurately calculate the number of vapor barrier rolls needed to cover the entire floor surface, especially since this material is relatively inexpensive.
- *Installing the first layer of glass wool*
Now, you must unroll the glass wool. You have two options: if the floor has joists, you will need to cut the insulation using a hand saw. The dimensions are straightforward: each strip (the sections of glass wool created after sawing) must be 2cm wider than the space between the joists. You then compress them so they fit snugly between the joists. The alternative method consists of unrolling large rolls of glass wool (also cut with scissors or a hand saw) directly onto the floor, without leaving an air gap.
They must be tightened, with both the first and last pieces pressed against the walls. Since the glass wool comes in a large roll, you should divide it into several sections to more easily adapt it to the filmed floor area. The beam at the base of the slope, the top plate, must also be covered with the glass wool. Ensure that the air vents are not blocked. Note: placing them directly on the ground is strictly prohibited.
- *Installing the second layer*
You have two options: you can either install the rolls with staggered joints (maintaining a 10cm offset between the bottom and top seams), ensuring that the seams do not overlap, or install them in a cross-joint pattern by unrolling them perpendicular to the first layer. The advantage of this method is that the seams will automatically be non-aligned. If the second layer features a film, you must puncture the surface of the glass wool using a utility knife to allow water vapor to pass through.